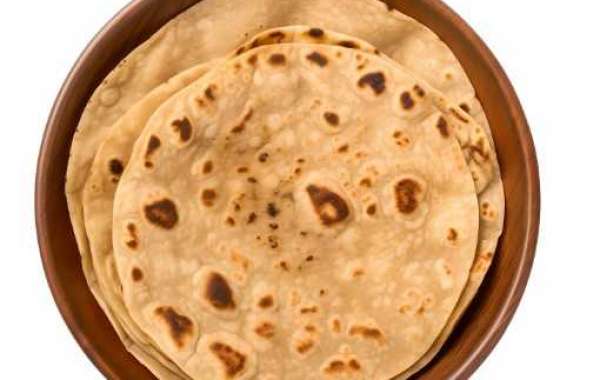
Roti, also known as chapati, is a quintessential bread that graces most Indian dining tables. Thin, soft, and puffed up with steam, this whole wheat flatbread is as integral to Indian meals as rice. While it might seem simple, crafting the perfect roti is an art that many strive to master. To truly honor the tradition of making roti, it's crucial to use authentic ingredients and tools, Which leads to many novices turning to pre-made roti kits which are in high demand these days. However, If you’re looking to elevate your roti-making skills, here are the foundational tips to set you on the right path
1. Select the Ideal Flour
The choice of flour is fundamental. Rotis are traditionally made using whole wheat flour, termed ‘atta’ in Hindi. Ensure you select a good quality atta, which is finely milled. It should feel soft to touch, and when pinched, it should hold together due to its fine texture.
2. Achieve the Perfect Dough Consistency
The dough’s consistency is the cornerstone of a soft roti. While mixing the flour with water, add the liquid gradually. The goal is to achieve a dough that is soft, pliable, and non-sticky. A stiff dough will result in hard rotis, so aim for a dough that’s soft yet holds its shape without being too sticky.
3. Knead with Dedicatio
Kneading is not just a physical act but a step that ensures uniformly soft rotis. Spend a good 10–15 minutes kneading the dough until it’s smooth and elastic. This helps develop the gluten, ensuring your rotis are soft and puff up nicely on the stove.
4. Rest, but Not Too Long
Once kneaded, the dough should be left to rest, covered with a damp cloth, but not for an extended period. A rest of about 15 to 30 minutes is sufficient. Over-resting might make the dough too soft and challenging to handle, while under-resting will not give the gluten enough time to relax.
5. Uniformity in Rolling
Rolling the dough into a consistent circle is a skill that comes with practice. Use a rolling pin and work from the center outwards, turning the dough frequently. Aim for a thickness that’s neither too thin nor too thick — about the thickness of a standard coin. This ensures even cooking and the signature puff of the roti.
The art of making roti is deeply embedded in Indian culinary traditions. It’s more than just a process; it’s a ritual passed down through generations. By focusing on these initial five foundational tips, you’ll be well on your way to crafting rotis that are soft, fluffy, and perfect every time.
6. Mastering the Flame
Heat management is pivotal when cooking rotis. Begin by heating the tawa (griddle) on a medium-high flame. Once it’s adequately heated, place the rolled-out roti onto it. The high initial heat ensures that the roti starts puffing up almost immediately. As bubbles form, it’s essential to lower the heat slightly to allow the inside of the roti to cook without charring the exterior.
7. The Hand Technique for Puffing
A defining characteristic of a perfectly made roti is its ability to puff up like a balloon. This is achieved by gently pressing down on the roti’s surface using a cloth as it cooks. The steam inside causes it to rise. Additionally, flipping the roti directly over the flame for a few seconds can enhance this puffing effect, but exercise caution to prevent over-charring.
8. Immediate Storage
Once off the flame, it’s crucial to store the roti in an insulated container or between cloth layers. This helps retain the steam and keeps the roti soft for a longer duration. Avoid stacking hot rotis directly on top of each other; instead, allow a brief cooling period to prevent them from turning soggy.
9. A Dash of Ghee or Butter
While this is optional, brushing your hot roti with a touch of ghee (clarified butter) or regular butter can elevate its taste and texture. The fat provides a slight richness and ensures the roti remains soft, especially if you’re planning to eat it a bit later.
10. Practice and Patience
No skill is perfected overnight, and roti-making is no exception. With each attempt, you’ll get closer to understanding the nuances — the right amount of pressure while rolling, the ideal flame intensity, or the exact moment to flip the roti. Embrace each learning opportunity and remember that even the most adept chefs have had their share of not-so-perfect rotis. What truly matters is the journey, the joy of learning, and the satisfaction of seeing progress with each effort.
In conclusion, the allure of a well-made roti lies in its simplicity. This humble bread, with its soft texture and subtle flavor, is a testament to the beauty of Indian culinary traditions. With these ten tips as your guide and a spirit of perseverance, you’re well on your way to mastering the delightful art of roti-making, creating memories and savoring every soft bite.


