Introduction
Embroidery enthusiasts, rejoice! The world of in-the-hoop embroidery offers endless possibilities for creative and functional projects. One such project that combines warmth and style is crafting unique fingerless mittens. In this article, we will guide you through the process of creating these one-of-a-kind accessories using machine embroidery designs. Whether you're a seasoned embroiderer or just starting, we'll show you how to convert picture to embroidery and utilize the expertise of an embroidery digitizing company like ZDigitizing to bring your vision to life. So, let's dive into the world of in-the-hoop fingerless mittens and discover how to make them easily.
The Magic of In-The-Hoop Embroidery
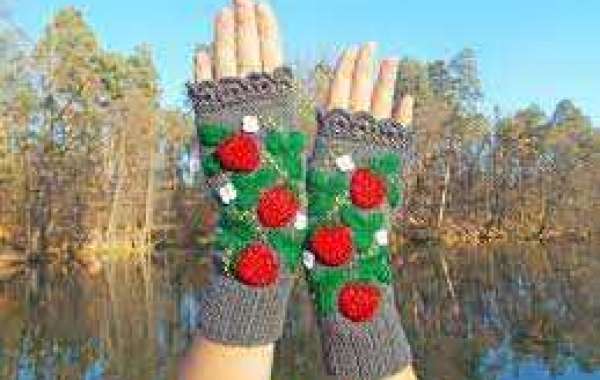
In-the-hoop embroidery is a versatile technique that allows you to create fully finished products using an embroidery machine. It's a fantastic way to make personalized gifts, decorate your home, or even start a small business. Fingerless mittens, in particular, are not only fashionable but also functional, making them a popular choice for in-the-hoop projects.
- Gather Your Supplies
Before we delve into the step-by-step process, make sure you have all the necessary supplies:
- An embroidery machine
- Hoops compatible with your machine
- Fabric for the mittens (fleece, wool, or any other warm material)
- Embroidery threads in your desired colors
- Tear-away stabilizer
- Scissors
- Needles
- Ruler or measuring tape
- Iron and ironing board
- Your chosen machine embroidery designs (you can find free embroidery designs online or purchase them)
- Choose Your Design
The first step in creating your unique fingerless mittens is selecting the perfect machine embroidery design. You can either design your own or find pre-made designs online. Many websites offer free embroidery designs, or you can opt for premium designs from reputable sources. Zdigitizing, for instance, is an embroidery digitizing company that provides high-quality digitizing services for embroidery, ensuring your chosen design is ready for stitching.
- Prepare Your Fabric
Once you have your design, it's time to prepare your fabric. Measure your hand to determine the size of the mittens you want to make. Use a ruler or measuring tape to ensure accuracy. Then, cut two pieces of fabric in the desired mitten shape, ensuring they are large enough to fit your hand comfortably.
- Hoop Your Fabric and Stabilizer
Now, it's time to hoop your fabric and stabilizer. Place one piece of fabric on the bottom hoop and add a layer of tear-away stabilizer on top. Ensure that the fabric is taut and smooth to prevent wrinkles during embroidery.
- Load Your Design
Load your selected machine embroidery design into your embroidery machine. Most modern machines have USB ports or card slots for easy design transfer. Make sure to center the design on the fabric and adjust the hoop to fit securely.
- Start the Embroidery
Thread your machine with the appropriate embroidery thread colors. Double-check the design settings, such as thread tension and stitch speed, to ensure a smooth embroidery process. Start the machine and watch as your chosen design comes to life on the fabric. The machine will automatically stitch out the design.
- Add the Second Fabric Piece
Once the embroidery is complete, remove the hoop from the machine. Carefully trim any excess stabilizer and thread from the design. Then, take the second piece of fabric and place it over the embroidered design, right sides together. Make sure the fabric aligns perfectly with the embroidered design.
- Stitch Around the Mitten
Secure the two fabric pieces together by stitching around the mitten shape, leaving the wrist area open. Be sure to backstitch at the beginning and end to reinforce the seams. This step not only attaches the two fabric pieces but also forms the mitten shape.
- Trim and Turn Inside Out
After stitching, carefully trim any excess fabric along the seams, leaving a small margin for reinforcement. Then, turn the mittens inside out through the wrist opening. You should now have a completed mitten with the embroidered design on the top.
- Finish the Wrist Opening
To create a clean and finished look, fold the raw edges of the wrist opening inward and press them with an iron. You can also add a cuff or decorative stitching for extra flair.
Conclusion
In-the-hoop embroidery fingerless mittens are a delightful blend of fashion and function, perfect for keeping your hands warm while showcasing your unique style. By following the steps outlined in this article and leveraging the expertise of an embroidery digitizing company like ZDigitizing for your digitizing services, you can easily bring your vision to life. With a wide range of machine embroidery designs and free embroidery designs available, you have the creative freedom to craft mittens that are as unique as you are. So, fire up your embroidery machine and start creating cozy and stylish fingerless mittens that will not only keep you warm but also make a fashionable statement. Happy stitching!