Embarking on the journey of screen printing can be both exciting and daunting. Whether you're aiming to reproduce intricate designs from an embroidery digitizing company or simply want to print a personal artwork, having the right materials at your disposal is crucial. Screen printing, a technique with roots dating back to ancient China, has evolved significantly with modern advancements. Today's practitioners have a plethora of tools and materials to choose from. Here's a comprehensive list of essentials to kickstart your screen printing venture in 2023.
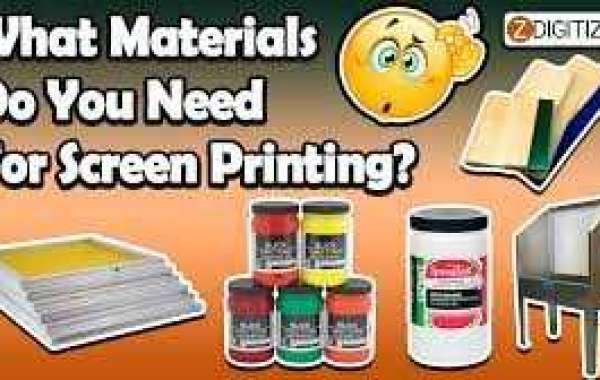
1. Screens: The heart of the screen printing process, screens are made of finely woven fabric stretched over a wooden or aluminum frame. The mesh count of the screen (number of threads per inch) determines the detail and ink thickness of your print. Designs with fine details, like those sourced from vector art services or machine embroidery designs, typically require higher mesh counts.
2. Squeegees: Used to push ink through the screen, squeegees come in various sizes and durometers (hardness). The choice of squeegee depends on the ink type and the design's intricacy.
3. Inks: Screen printing inks come in various formulations, including:
- Plastisol: The most common ink type, ideal for fabric printing.
- Water-Based: Eco-friendly and offers a soft finish.
- Discharge: Used to bleach out the fabric's original color and replace it with a new one.
- Specialty Inks: Such as glow-in-the-dark, puff, and metallics.
4. Emulsion: A photosensitive solution, emulsion is applied to the screen and exposed to light to create the stencil. The unexposed areas (where your design is) will wash out, leaving a permeable stencil on the screen.
5. Light Source: For the emulsion to set and create a stencil, a proper light source is essential. While professional setups use exposure units, beginners can start with direct sunlight or halogen lights.
6. Transparency Film: Your design, whether it's a free embroidery design or a custom artwork, needs to be printed on a transparency film. This film is then placed on the screen coated with emulsion, and exposed to light.
7. Press: While manual presses are great for beginners and small batches, automatic presses, which can print on multiple screens simultaneously, are ideal for larger operations.
8. Cleaning Supplies: Screen printing can be messy. Having an array of cleaning supplies, including emulsion removers, ink degraders, and scrub brushes, is crucial.
9. Heat Gun or Conveyor Dryer: After printing, the ink needs to be cured to ensure durability. A heat gun is suitable for beginners, while conveyor dryers are used for bulk printing.
10. Test Fabrics or Pallets: Before finalizing a print, it's wise to test the design on scrap fabric or pallets. This ensures the design's clarity and the ink's consistency.
11. Design Software: To convert picture to embroidery or screen printing format, or to tweak and finalize designs, reliable design software is indispensable. Platforms like zdigitizing often provide digitizing services for embroidery, making the design conversion process seamless.
12. Miscellaneous Supplies: Including tape (for covering any exposed areas of the screen), gloves, spatulas (for mixing inks), and rulers or T-squares for alignment.
Conclusion:
Screen printing, with its blend of artistry and technique, offers endless possibilities. Whether you're reproducing intricate designs, crafting custom apparel, or exploring the vast world of print media, having the right materials is paramount. As you dive into this vibrant craft, remember that the journey is as rewarding as the final product. Each print, be it inspired by a machine embroidery design or a hand-drawn sketch, is a testament to your creativity and dedication. Equip yourself with the right tools, continuously learn and adapt, and let every screen-printed piece be a canvas of your artistic journey.


